Mastering Spill Kits: Your Step-by-Step Guide
Okay, you have spill kits. But having them isn’t enough — what do you do if and when those dreaded spills actually occur?
In this guide, we’ll walk you through the basics of spill kits and how to use them to tackle spills with confidence.
Understanding Spill Kits
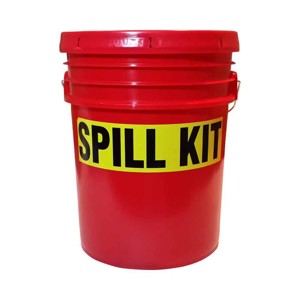
A spill kit is like a superhero’s utility belt for liquid mishaps. It’s a carefully curated collection of tools and materials designed to help you contain, clean up, and properly dispose of spilled liquids, be it oils, chemicals, or hazardous substances.
Spill kits come in various sizes and types, tailored to specific spill scenarios. From compact kits for smaller spills to large industrial kits, these handy packages are a must-have for anyone working with liquids.
What are the Components of Spill Kits?
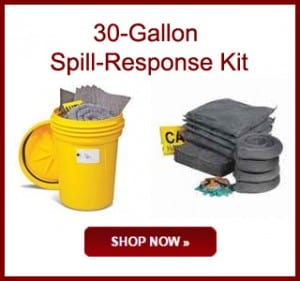
 Before diving into the spill-tackling process, let’s familiarize ourselves with the typical components of a spill kit. For example, the essential items that might come in your average 30-gallon spill kit:
Absorbents
These are the workhorses of a spill kit. Absorbents come in various forms such as pads, socks, pillows, and loose granules. They are specifically designed to soak up liquids and contain spills.
- Pads — Absorbent pads should be placed directly on spills to absorb liquids quickly.
- Socks — Use absorbent socks to circle spills to contain liquids and prevent further spread. Make sure to overlap the ends of socks to create leak-proof barriers.
- Pillows — Like pads, absorbent pillows should be placed directly on top of spills. Pillows will absorb a higher volume of liquid than pads.
- Loose granules — As the name suggests, these are materials you can sprinkle over a spill. These are especially useful with rough or uneven surfaces, like cracks in concrete.
Personal Protective Equipment (PPE)
Safety always comes first. PPE might include gloves, goggles, coveralls, and even respiratory protection, depending on the type of spill you’re dealing with.
- Goggles — Goggles should be worn when cleaning up spills to protect the eyes from hazardous liquids, which may splash during cleanup.
- Gloves — During spill cleanup, nitrile gloves will protect hands from hazardous materials.
Containment Tools
These items help you create a barrier around the spill to prevent it from spreading further. Containment tools could be booms or barriers.
- Booms — These items are similar to oversize socks, with a larger absorbency capacity. They are available in white, gray, or yellow, specific to the spilled material they will clean up.
Sealing and Disposal Materials
Once the spill is contained and cleaned, you need proper materials to seal and dispose of the waste safely. This might include waste bags, ties, and labels.
Instruction Sheets and Guides
Most spill kits come with easy-to-follow instructions on how to use the kit effectively and safely. These guides are your trusty sidekicks as you combat the spill to answer any additional questions users may have.
Optional Add-ons
Because no two facilities are the same, sometimes it’s necessary to customize your spill kit with additional equipment. Empty drums are also available for purchase if you want to build your own 30-gallon spill kits from the absorbent materials we offer. Some of the extras that you may wish to consider include:
- Dikes — Non-absorbent dikes are ideal to create a small berm wall which can help prevent spills spreading or entering drain outlets.
- Drain Covers — The name is self-explanatory, meaning you cover the drain with a protective seal to keep spills out.
- Floor Drain Plugs — These perform a similar function to covers, but are inserted into a drain to create a tight seal.
- Berms — Depending on the source of the spill, berms are often helpful to position under leaking equipment. They act like a catch basin.
Step-by-Step Guide to Using a Spill Kit
Now that we know what’s in a spill kit, let’s break down the process of using one step by step:
Step 1: Assess the Situation
Before you jump into action, assess the spill for potential hazards involved. Identify the type of liquid that has been spilled—whether it’s oil, chemicals, or something else. This information will help you select the appropriate absorbents and containment tools from the spill kit.
Step 2: Put on PPE
Safety is paramount. Before you begin handling the spill, make sure to don the appropriate personal protective equipment. This might include gloves, goggles, coveralls, and any other gear recommended for the specific type of spill.
Step 3: Contain the Spill
Use containment tools like booms or barriers to prevent the spill from spreading further. If the spill is in an open area, create a barrier to contain the liquid. This step is crucial to minimize the potential impact of the spill.
Step 4: Deploy Absorbents
Now it’s time to bring in the absorbents. Place absorbent pads, socks, or pillows on and around the spill. These materials will start soaking up the liquid, making the area safer and easier to clean.
Step 5: Clean Up
Gently press down on the absorbents to ensure they’re absorbing as much liquid as possible. Carefully remove the saturated absorbents and replace them with fresh ones until the spill is no longer spreading.
Step 6: Proper Disposal
Once the spill is cleaned up, you’ll need to properly dispose of the used absorbents and any contaminated materials. Follow the guidelines provided in the spill kit’s instructions to seal the waste in appropriate bags and label them accordingly.
Step 7: Decontaminate
After the spill is cleaned and contained, it’s a good practice to decontaminate the area to ensure there are no lingering hazardous materials. Use appropriate cleaning agents and follow safety protocols.
Step 8: Restock the Spill Kit
After the spill has been dealt with, take some time to restock the spill kit. Replace any used or depleted components so that it’s ready for the next emergency. This ensures you’re always prepared for unexpected spills.
Preparation is Key
When spills occur, they can have severe consequences for the environment, human health, and workplace safety. Therefore, you need to have a plan in place. Spill response is a critical aspect of any safety and environmental management plan. You can reduce the risk of damage and injury by having spill kits handy. (For information about how to choose them, read 3 Things You Need to Know About Spill Kits.)
Make sure you inventory all of the liquids on your site — know what they are, where they are, and their volumes. Identify which areas are at high risk of spills and take note of the worst-case-scenario volume of liquid that you may have to deal with at each location. Then, ensure that your spill kits are well-suited for the types and volumes of liquids and that they are accessible.
You can make spill cleanup easier by reviewing or preparing your own Safety Data Sheet — as recommended by the Occupational Safety and Health Administration — for each liquid at each location. Check regularly that these sheets are up to date so employees can refer to them at the time of spills.
Another essential part of spill preparation is ensuring that your staff has proper spill kit training.
- Conduct regular training on spill-control best practices, safety tips, and the use of spill kits.
- Have “spill drills” in which your staff responds to mock spills; drills are great ways to test your preparedness, find weaknesses, and identify areas for improvement.
- Check out this video by Seattle Public Utilities to see more about preparation, handling, and how to use spill kits:
Final Thoughts
Learning how to use spill kits is like having a superpower to handle liquid disasters. By following these simple steps, you can confidently take charge when spills occur, whether you’re at home, at work, or anywhere in between.
Remember, safety is key—always wear the recommended personal protective equipment and follow the instructions provided with the spill kit. With the right knowledge and tools at your disposal, you’ll be well-equipped to tackle spills like a pro and keep your environment clean and hazard-free.
Need more in-depth information about one or more of these spill kit items and how they’re used? Contact AbsorbentsOnline and we’ll be happy to help! Email Travis Zdrazil at travis@absorbentsonline.com or call toll-free on (800) 869-9633.
Check out our FAQs to Learn More About Spill Kits:
- Which Spill Response Kit Belongs in Your Facility?
- What Should a Spill Kit Contain?
- Where Should Spill Kits Be Located?
- How Often Should Spill Kits Be Inspected?
- Does OSHA Require Spill Kits?
This is a revision to a blog post with an original publication date of March 15, 2016.
